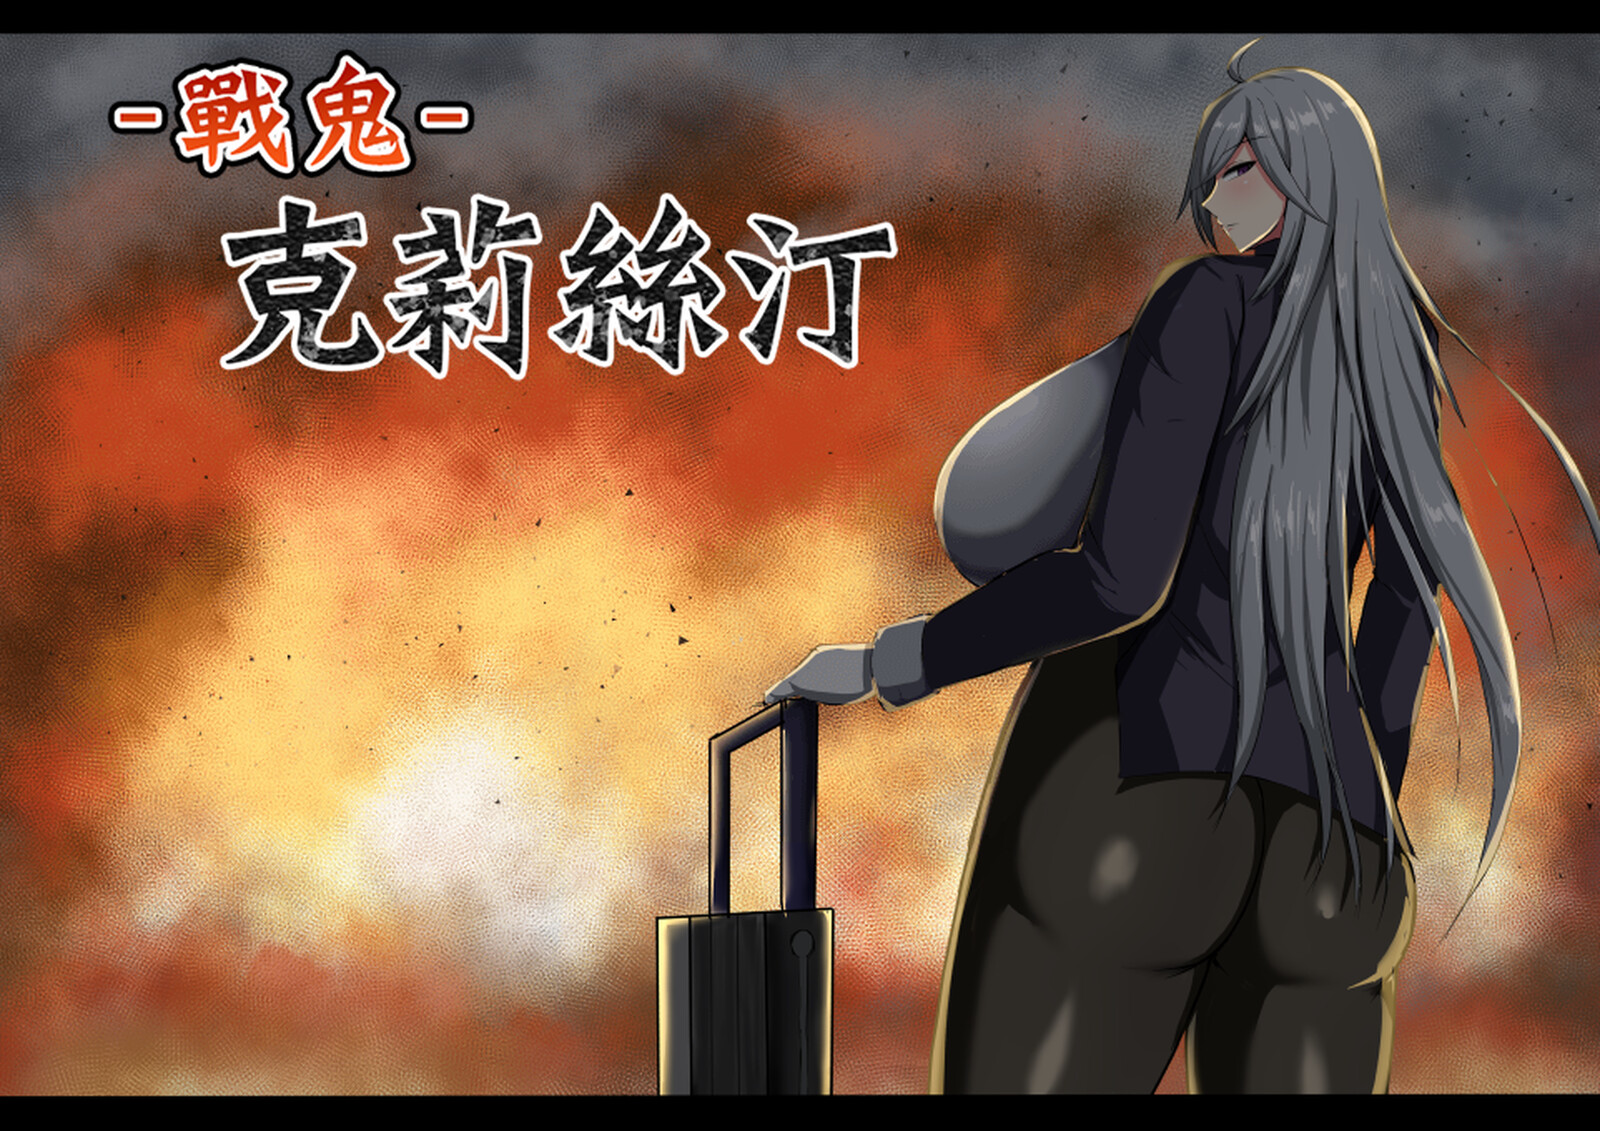
The War Demon Who Lost Her Life to a Single Drink
Kirsten is the Empire’s strongest female general, nicknamed “the War Demon” for how she conducted herself on the battlefield. When the story opens the war is already over, and she has no idea what she is supposed to do with the rest of her life
That is when an old man claiming to be a fortune teller strikes up a conversation with her. He offers the first reading for free and asks her to drink a “special beverage” first. She drinks it, and passes out on the spot. He was never a fortune teller at all, he was a mage, and he used the opening to place the Curse of Enslavement on her
The person who picked her up off the ground was Aria (亞莉亞), the woman Kirsten later calls “the great mage who commands the Four Unbreakable Pillars”. Aria used transfer magic to carry her unconscious body back to her own home, then explained what the curse actually does: it is an ancient spell that forces total obedience, its effect creeps in over time, and once it fully takes hold Kirsten becomes a puppet for whoever holds her leash. Since the mage cast it, nobody but the caster can undo it
Which leaves exactly one solution. Track the old man down and make him lift it himself
Aria says he fled toward Mebuchi Village (梅布奇村) on the frontier. Kirsten remembers it as an ordinary farming village, and reaching it means crossing Immofussa Plain (茵莫弗薩平原). She decides to leave immediately
Before she goes, Aria brings up something she probably did not want to hear: avoid casual sex until the curse is lifted, for reasons tied to how the curse operates. Aria also calls herself “the undying witch”, which Kirsten flatly refuses to believe
Once she reaches Mebuchi Village, Kirsten starts by investigating the bandit gang operating nearby. Digging into it reveals that the bandits, the puppet soldiers, and the strange incidents scattered across the map all point back to one name: Geha the Old Mage (老魔法師格哈). The trail takes her through the Northern Highway, a demi-human settlement, the Forest of Despair (失意的樹海), the Starlight Express (星光特快車) that runs across the continent, the arena in the prosperous city of Harapania (哈拉帕尼亞), and finally the frozen city of Telas (特拉斯) and the Gekkei Snowfield (月晶雪原). She picks up a handful of companions along the way: Jay (杰) the hunter, the Middle-Aged Apothecary (身為藥劑師的中年老頭), and the Foreign Fighter (異國的鬥士)
The chase is not a simple one. The curse deepens as time passes, so Kirsten is effectively running with a lit fuse attached to her. Along the route she walks into the demi-human settlement, sees how they live under the Empire’s system, and runs into a string of attacks aimed at the settlement. How the “Empire’s strongest” is supposed to feel about all of that is a question the game puts in front of her alongside the manhunt. Aria’s “undying” claim, and the fragments scattered across the world that stir up Kirsten’s past, are both left for the back half of the story
The old man’s true identity is Geha the Old Mage. The route to the Mage’s Labyrinth (魔法師的迷宮) is found in a ruined church at the far end of the Gekkei Snowfield, and the two of them settle things in the labyrinth’s deep levels
*The walkthrough sections below contain story spoilers. Read at your own discretion
Straightforward Turn-Based Combat, With Two Rules You Should Know First
Combat is standard command-based JRPG turn-based fare, with no odd real-time inputs to practice. The main route is linear too, regions unlock in order, there are no branching paths that force a choice, and there is no affection system. The parts that actually require planning are when to pick up requests, and the challenge content that only shows up after you clear the game
The difficulty options are where this game is unusually generous. Set the difficulty to Casual and the game applies a status to every enemy the instant battle begins, dropping all eight of their base stats to one tenth of the listed values. That goes well past adjusting a damage multiplier, it rewrites boss stat blocks outright, so anyone who just wants to see the story has almost no chance of hitting a wall
The other thing worth knowing up front is the Immortality status. Most large bosses have it applied at the start of the fight, giving them complete death immunity, so their HP bar can hit zero and they still will not fall. The game only removes the status and registers the kill once the battle event finishes its scripted stage. So “I dropped it to zero HP and it did not die” is normal behavior, your save file is fine
Almost every large boss runs on a fixed turn cycle plus trigger-based mechanics, and the difficulty drops noticeably once you read them. That is also why this title suits players who enjoy picking apart boss behavior patterns
Losing Is Part of the Content, Not a Mistake
The most interesting design choice here is that losing is written in as proper content. Losing to most bosses does not kick you straight back to the title screen, it plays a defeat scene specific to that boss, and only then asks whether you want to retry
Those scenes are themselves collectible entries in the recollection room. Which means players chasing full completion have to deliberately throw a few fights. Save before any boss that has a defeat scene, otherwise cleaning them up afterward gets tedious. Losing to the same boss a second time skips the scene outright, which is a decent bit of consideration
The other running system is body state. Pregnancy, lactation, and arousal are reflected directly in the character portrait, they swap automatically as the state changes, and they gate whether certain events can trigger at all. The request “Handing Over Breast Milk Is Your Job, Right?” can only be completed while pregnant, so body state is not just cosmetic, it is a completion condition for some tasks
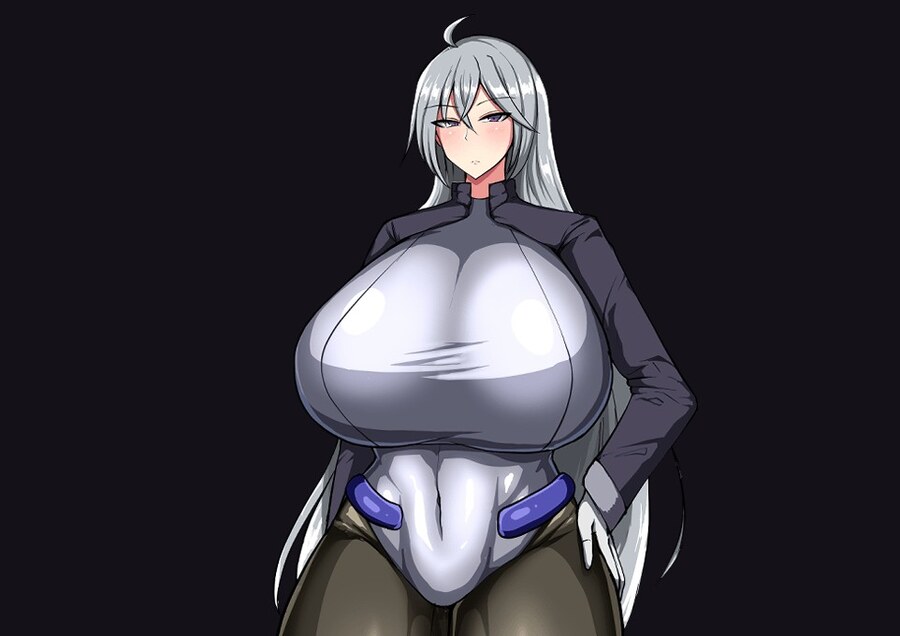


There is a fair amount of collectible content here. Beyond the defeat scenes, the menu holds a request handbook, a monster encyclopedia, system notes, and an offspring record. The request handbook tracks “in progress” and “completed” separately and shows a completion rate once you finish, and the offspring record has 19 entries
Body state also includes a restraint suit on top of the three above, an equipment piece obtained through an event, which changes the portrait in the same way. That portrait is collected together with the in-game event CGs in the bonus gallery further down this article
One Ending, With the Real Meat After the Credits
To be clear up front, this game has a single clear ending. There is no GOOD/BAD/TRUE route split, and no affection or dialogue choice will grow extra endings.
The clear ending is reached by defeating Geha the Old Mage himself in the deep levels of the Mage’s Labyrinth. The scene runs uninterrupted with no choices, and the ending walks you back through each town in turn before stopping at the entrance to Immofussa Plain. There is one hidden check during that sequence: the game tests whether your “experience count” is zero, and if it is, you get an extra item that specifically notes clearing the game as a virgin
Conversely, losing to Geha in the deep levels triggers “BAD END ~The End of Pregnant Sow Kirsten~”, the only ending in the game actually labeled BAD END, and also a recollection room collectible. It is reversible, the game asks whether you want to retry once the scene finishes, and the full scene only plays on your first defeat
The post-clear stretch is where collecting really begins. The recollection room opens, the train gains a new destination called “Terminus” (Miseria, City of Ruin), the arena adds post-clear matches, four post-clear requests appear (Rei and Jinu join the party at this point), and bosses across the map become rematchable
On volume: 7 recruitable characters, a battle party cap of 4, 18 requests (4 of them post-clear only), 12 main story bosses, 7 optional bosses, 9 post-clear bosses, 8 types of powerful symbol enemies on the map.
On time: a normal clear runs around 10 hours, and cleaning out the story plus collectibles pushes past 25 hours in practice. If what you want is multiple endings or romance-raising branches, this one probably will not scratch that itch. But if you like standard JRPG turn-based combat and are willing to grind out every defeat scene and encyclopedia entry, there is plenty here
Walkthrough
The walkthrough data below is compiled from actual play and in-game data. Where a name has no official English version, the Traditional Chinese in-game name is noted in parentheses on first mention
1. Playable Characters
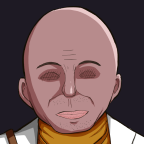
The battle party caps at 4. Companions leave and rejoin more than once: Jay joins at the demi-human settlement, temporarily leaves when his identity is exposed, rejoins when the settlement is attacked, then permanently leaves deep inside the Merewa Canyon (蜜縫峽谷) cave. The Middle-Aged Apothecary leaves the moment you walk out of the Forest of Despair. The Foreign Fighter temporarily leaves after every single arena match. All three rejoin at once during the ruined church event in the Gekkei Snowfield, automatically syncing to Kirsten’s level, and the final party is locked in from there. Seeing teammates vanish from your party mid-game is normal progression, not a problem






2. Main Story Route
The route below follows actual progression order, with each section noting where to go, what to do, and what it unlocks
Worth stating first: very few gates actually block progress. Once you have the Mirror of Transference you can hop freely between towns, and once the train is repaired you can move between the two cities in either direction. So the chapter order is “the order the story advances”, not a rule that you are stuck in one region per section
Prologue: Immofussa Plain
- Leave the imperial capital, cross Immofussa Plain, and walk all the way to the frontier village of Mebuchi. This stretch is forced progression, just follow the path.
Chapter 1: Mebuchi Frontier Village and the Bandit Hideout
- Gather information in the village first, then see the village chief and accept the bandit extermination request.
- The bandit hideout is in a cave at the far end of the Northern Highway, not near the village.
- A boulder blocks the path on the hideout’s second floor. Grab the rope from the corner of the second floor first, then come back and tie it off to reach the depths.
- Face the bandit leader at the deepest point. This is the first proper boss fight in the game.
- Report back to the village chief after winning, and he will send you up the Northern Highway after the old mage.
Chapter 2: The Northern Highway
- Head north along the Northern Highway, find the old man in area 2, then fight two puppet soldiers. This fight is winnable, and you should win it.
- Even after you win, the old man retreats and burns down the suspension bridge, sending Kirsten falling into the ravine. That is scripted, not a loss on your part.
- If you actually lose, a dedicated defeat scene plays, after which you can return to just before the fight or lower the difficulty on the spot.
- The fall drops you straight into the water-drawing area of the demi-human settlement. With the bridge down, the way back is closed until much later.
Chapter 3: The Demi-Human Settlement and Merewa Canyon
- Advance the story in the settlement, where Jay joins the party.
- Go to the elder’s house and accept the request to head to Merewa Canyon alone and collect the valley’s clear spring water from a strange bird’s nest.
- Cross Merewa Canyon areas 1 through 3, fighting the nesting bird first.
- Return to the elder’s house with the honey and Kirsten’s identity as an imperial soldier is exposed. The party is driven out of the settlement and Jay temporarily leaves.
- Pursuers ambush you on the way out, and when you turn back the settlement is under attack, requiring you to drive off the Phimo Dragon.
- Jay rejoins once the event ends. Strange bird first, Phimo Dragon second, do not mix up the order.
Chapter 4: Merewa Canyon Cave
- Enter the cave from Merewa Canyon area 3. This is a multi-level underground dungeon.
- Jay permanently leaves when you reach the deepest part of the cave, and the exit leads to Northern Highway area 3.
- The cave depths also hold optional heavy hitters like the Giant Fortress Turtle, which you can walk past.
Chapter 5: The Forest of Despair
- Enter the Forest of Despair from Northern Highway area 3. Area 1 is a looping maze that sends you back to the start twice, which is scripted.
- You then wake in a tent and meet the Middle-Aged Apothecary.
- Stepping out of the tent gets you surrounded by Shadows in forest area 2, and the apothecary formally joins after that fight.
- There are three warp crystals scattered through the forest that enable fast travel once unlocked. They are a convenience, not a clear condition.
- Face the Shadow Mother at the deepest point, then head for the exit after beating her.
- The apothecary leaves the moment you exit the forest, and afterward waits in Northern Highway area 4 as a merchant.
Chapter 6: The Prosperous City of Harapania
- After leaving the forest, head south along the Northern Highway. This area has two optional zones (a noble’s mansion and a vagrant camp), neither of which affects the main story, so do them in any order.
- Entering Harapania triggers forced story events, and you obtain the ☆Mirror of Transference here, letting you jump between towns you have visited.
- Your movement is restricted after the scene ends, the station is your only destination. The station clerk says tickets to Telas are sold out.
- Return to the city and check the notice board to learn that the arena’s grand prize includes a ticket to Telas. The restriction lifts, and only then can you enter the arena.
Chapter 7: The Arena
- Sign up at the arena counter, then go to the east waiting room. The Foreign Fighter joins here, and Kirsten also has to speak to the fighter Sni before she can enter.
- Every match is 2v2, not a solo bout. Your partner temporarily leaves after each match, so return to the waiting room to re-form the team before the next one.
- The bracket runs: round 1 (two low-rank fighters) → round 2 (mid-rank) → watch KING’s match (mandatory, skipping it blocks round 3) → round 3 (high-rank) → final against KING.
- KING’s attendant uses “Cover KING” to intercept attacks for him, so you cannot touch the main body without handling the attendant first.
- Winning the tournament is a hard gate: until you have the ticket, the station will not sell you one, which means you cannot reach the next region.
Chapter 8: The Starlight Express
- After winning, buy a ticket at Harapania station bound for the frozen city of Telas. You board starting in your own compartment car.
- Head forward through the dining car and the driver’s cabin, and a dinner event triggers on the way back.
- Sleep in your compartment after dinner, wake to find every passenger gone, then check the driver’s cabin to confirm the driver is missing, which lets you climb outside.
- Fight the Tentacle Lifeform outside the train. The shops and facilities on board only open after you beat it, and from then on the train is available on demand, so you can return to Harapania any time.
- You disembark at Telas station, and the frozen city of Telas is straight ahead.
Chapter 9: The Frozen City of Telas and the Gekkei Snowfield
- Aria joins the party at level 30 once you arrive in Telas.
- Head for the Gekkei Snowfield and push through to area 4. Nothing along the way gates progress.
- Walk from area 4 into the ruined church at the far end. There is no way back, and a flashback event triggers.
- Back in snowfield area 4, the party is reshuffled: Aria leaves, and Jay, the apothecary, and the Foreign Fighter all rejoin at once, automatically syncing to Kirsten’s level. The final party is set from here.
- The event ends by automatically warping you to the entrance of the Mage’s Labyrinth, so there is no route to find yourself.
Chapter 10: The Mage’s Labyrinth
- The route runs entrance hall → area 2 → area 3 → area 4 → area 5, with nothing blocking you along the way.
- Both push-block puzzles are in area 5, powered by the Foreign Fighter, and you need both.
- Once both are done, return to the entrance hall, where the yellow floor tiles on the north side interlock to complete a path, leading up to the deep level entrance.
- Area 3 holds the optional boss Magma Golem, whose two arms act independently, and the main body still counterattacks after you destroy both arms.
Final Chapter: The Mage’s Labyrinth Deep Levels
- The trigger point in the deep levels runs two battles back to back with no saving in between, so finish your preparations before entering.
- The first opponent is called “the Old Man”, which is actually Geha’s first form, accompanied by two puppet soldiers. This fight cannot be fled and cannot be lost, it is a story battle.
- He revives your fallen party members, with the line “Get up. The execution is not over yet.” He has no intention of letting you die here.
- The story advances after the first battle, the system fully restores the party, and then the second battle begins.
- The second opponent is Geha the Old Mage himself. This fight can be lost, and losing leads into a dedicated BAD END scene.
- Beating Geha goes straight into the ending sequence, and the clear flag lights up.
3. Request List
The game has 18 requests in total, 4 of which are post-clear only
Full request table← Swipe horizontally →
| Request | Availability | Location | Client | Completion Condition | Reward |
|---|---|---|---|---|---|
| Searching for Pure White Thread | Normal | Mebuchi Frontier Village | Middle-aged woman who loves sewing | Talk to her while holding 3 spools of “Pure White Thread”. | 3,000 pence |
| Handing Over Breast Milk Is Your Job, Right? | Normal | Mebuchi Frontier Village | Old man who runs a dairy | Talk to him while pregnant and let him milk you. | His gratitude |
| Toxic Front Line | Normal | Demi-Human Settlement | Demi-human elder | Defeat the Phimo Dragon Subspecies | Expansion part “Special Ammunition Added” |
| A Certain Noble’s Top-Secret Request | Normal | A Noble’s Mansion | The noble’s son | Accompany the noble’s son through his coming-of-age rite. | 30,000 pence |
| The Soldier Who Investigates Anything | Normal | Northern Highway | Rookie writer for a travel magazine | Stay one night at the inn in the vagrant camp. | 10,000 pence |
| Is This a Cake? | Normal | A Noble’s Mansion | Extremely clumsy mansion maid | Attempt to bake a cake. *Success or failure both count. | One finished cake |
| Mushroom Foraging in the Forest | Normal | Prosperous City of Harapania | Master chef Carius | Deliver 5 Large Mushrooms | A dish cooked by a master chef |
| Thrills and Chills! Her First Part-Time Job ♥ | Normal | Prosperous City of Harapania | Bar manager | Finish the part-time shift. | 5,000 pence *adjusted up or down based on job performance. |
| Searching for a Handkerchief | Normal | Prosperous City of Harapania | Mother slowly losing her empathy | Recover the handkerchief and hand it to the child. | Accessory “Healing Necklace” |
| An Elder Is Like a Father | Normal | Vagrant Camp | Elderly vagrant | Wipe down the old man’s body. | Accessory “Forced Training Device” |
| Extend a Loving Hand to the Pitiful Vagrants! | Normal | Vagrant Camp | Vagrants who are filthy beyond reason | Obtain condoms and mate with the filthy vagrants. | Accessory “Vagrant’s Brain Trust” |
| The Snowfield Where I Once Hunted Rabbits | Normal | Frozen City of Telas | Rabbit hunter Kanogawa | Talk to him while holding 5 “Snow Rabbit Ears”. | Homemade honey |
| Take the Legendary Podium! | Normal | Frozen City of Telas | Female teacher with a strong libido | Teach a class for the students. | 10,000 pence |
| The Lost Baby Penguin | Normal | Gekkei Snowfield | Baby of the Nuri Metamorph Penguin | Bring the baby penguin back to its parent. | ??? |
| Scorched Earth Territory | Post-clear | Immofussa Plain | Mebuchi village chief | Drive off the Flame King Dragon Flamma | Accessory “Flame King Orb” |
| Thunder Roaring Through the Forbidden Zone | Post-clear | Miseria, City of Ruin | Jinu | Drive off the Thunder King Dragon Tonitors | Accessory “Thunder King Orb” |
| In the Frozen Moment | Post-clear | Gekkei Snowfield | Rei | Drive off the Ice King Dragon Stiria | Accessory “Ice King Orb” |
| HIDE AND SEEK! | Post-clear | Prosperous City of Harapania | Girl who loves hide-and-seek | Play hide-and-seek with her until she is satisfied. | Accessory “Beep Beep Hammer” |
Requests That Trip People Up
- The Soldier Who Investigates Anything: after staying the night at the vagrant camp, talk to the client again in the camp to complete it. No need to trek back to the Northern Highway.
- The Lost Baby Penguin: bringing the penguin to its parent deep in the Gekkei Snowfield completes it automatically, with no report-back required.
- Thunder Roaring Through the Forbidden Zone: the fight starts on the spot once accepted, and completes right after. Drop your battle party to three or fewer first, or Jinu will not join.
- In the Frozen Moment: the fight starts on the spot once accepted, and completes right after. Drop your battle party to three or fewer first, or Rei will not join.
- HIDE AND SEEK!: find four hiding spots in order, with the last on the first floor of the love hotel, and it completes as soon as you find her.
- Extend a Loving Hand to the Pitiful Vagrants!: simply carrying condoms completes it directly, and it registers as complete even if you never accepted the request, so the handbook can show a request you never took as already done. That is how the game itself checks it, and it does not affect progress.
4. Boss Data
All values below are the raw numbers on Standard difficulty. On Casual, every enemy stat drops to one tenth
How to Read Drop Rates
The percentages in the boss tables are independent drop chances per item, not a distribution. For example, an enemy listed with “Medicinal Herb (33%), Energy Herb (33%)” rolls two separate dice when you kill it: the herb has a one in three chance to drop, and the energy herb also has a one in three chance. Getting both, getting one, or getting neither are all possible outcomes
That chance can be doubled. Equip the accessory “Demi-Human Charm” and every normal drop rate becomes twice as likely, turning the example above into 66% each. The charm is a story gift from the demi-human settlement and costs nothing, so put it on before farming materials. The bonus only affects normal drops and does nothing for rare drops
Rare Drops Have Conditions
Items marked “rare” are not something you brute-force with luck, they require specific conditions to drop. The most universal trick is using the item “Dissection Solution” on the target, which pins that monster’s rare drop rate at 100% and works on every monster with a rare drop slot
If you would rather not spend the item, you can meet the individual conditions instead:
- The three King Dragons (Flame King / Thunder King / Ice King): land the killing blow with a raid-type skill of the matching element to get their respective “Reverse Scale”.
- Flower Fairy Enawen: inflict “Frostbite” on her at least once during the fight.
- Shigyoketsu Giant Catfish: have “Paralysis” active on it at the moment you kill it.
- Belly-Slam Kangaroo: land the killing blow with a normal attack or a wide-area slash.
Main Story Bosses
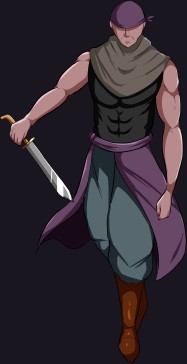
| HP | 600 |
|---|---|
| EXP | 500 |
| Weakness | None |
| Immune | Poison, Burn |
| Allies | Bandit Gang Grunt (HP100); Bandit Gang Grunt with Sleeping Drug (HP70) |
| Drops | — |
| Location | Bandit Hideout, deepest area |
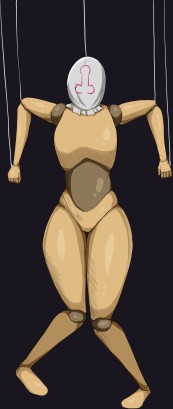
| HP | 800 |
|---|---|
| EXP | 600 |
| Weakness | Blunt ×1.5 |
| Immune | Poison, Burn |
| Allies | Puppet Soldier (Support Type) (HP600) |
| Drops | — |
| Location | Northern Highway-2 |
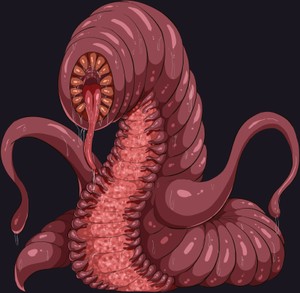
| HP | 12,000 |
|---|---|
| EXP | 12,000 |
| Weakness | None |
| Immune | Poison, Burn |
| Drops | Mysterious Gear (rare) |
| Location | Starlight Express, outside the train |
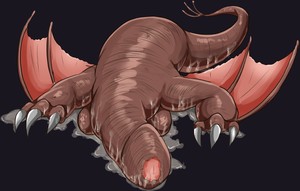
| HP | 3,000 |
|---|---|
| EXP | 3,000 |
| Weakness | Ice ×1.5 |
| Immune | Poison, Burn |
| Drops | Blast Flame Sac (rare) |
| Location | Demi-Human Settlement, Merewa Canyon-3 |
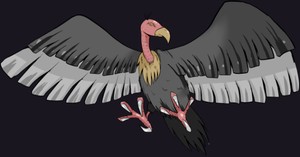
| HP | 2,000 |
|---|---|
| EXP | 1,000 |
| Weakness | Shot ×1.5, Thunder ×1.5 |
| Immune | Poison, Burn |
| Drops | — |
| Location | Merewa Canyon-3 |
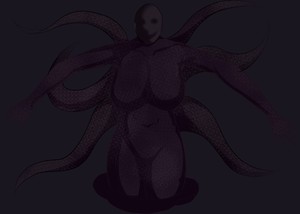
| HP | 4,400 |
|---|---|
| EXP | 6,000 |
| Weakness | None |
| Immune | Poison, Burn |
| Allies | Shadow (HP400) |
| Drops | Tentacle of the Shadow Core (rare) |
| Location | Forest of Despair-9 |
| HP | 2,500 |
|---|---|
| EXP | 1,500 |
| Weakness | None |
| Immune | Poison, Burn, Blind |
| Drops | — |
| Location | Arena, competition floor |
| HP | 4,000 |
|---|---|
| EXP | 3,000 |
| Weakness | None |
| Immune | Poison, Burn, Blind |
| Allies | Low-Rank Fighter (HP2500) |
| Drops | — |
| Location | Arena, competition floor |
| HP | 5,500 |
|---|---|
| EXP | 5,000 |
| Weakness | None |
| Immune | Poison, Burn, Blind |
| Allies | Mid-Rank Fighter (HP4000) |
| Drops | — |
| Location | Arena, competition floor |
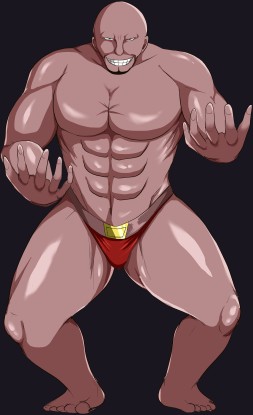
| HP | 15,000 |
|---|---|
| EXP | 12,000 |
| Weakness | None |
| Immune | Poison, Burn, Blind, Paralysis, Sleep |
| Allies | KING’s Attendant (HP6000) |
| Drops | Fighting Spirit Belt (100%) |
| Location | Arena, competition floor |
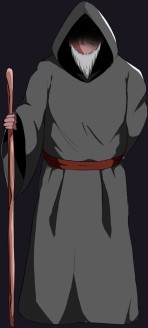
| HP | 30,000 |
|---|---|
| EXP | 0 |
| Weakness | None |
| Immune | Poison, Burn |
| Allies | Puppet Soldier (Assault Type) (HP3500); Puppet Soldier (Disruption Type) (HP3200) |
| Drops | — |
| Location | Mage’s Labyrinth, Deep Levels |
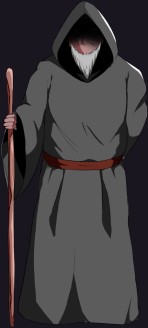
| HP | 30,000 |
|---|---|
| EXP | 30,000 |
| Weakness | None |
| Immune | Poison, Burn |
| Allies | Puppet Soldier (Assault Type) (HP3500); Puppet Soldier (Disruption Type) (HP3200) |
| Drops | — |
| Location | Mage’s Labyrinth, Deep Levels |
Optional Bosses
Approaching one brings up a “fight or not” confirmation, and choosing no lets you walk away with no effect on the main story
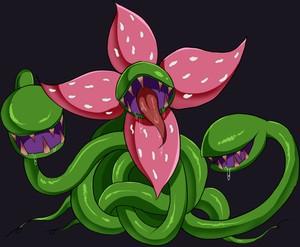
| HP | 7,800 |
|---|---|
| EXP | 7,200 |
| Weakness | Slash ×1.5, Flame ×1.5 |
| Immune | Poison, Burn |
| Drops | Chaos Flower Petal (rare) |
| Location | Forest of Despair-4 |
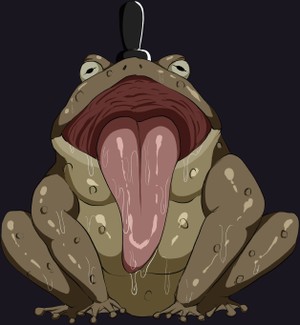
| HP | 6,500 |
|---|---|
| EXP | 6,000 |
| Weakness | Thunder ×1.5, Blunt ×1.5 |
| Immune | Poison, Burn, Sleep |
| Allies | Frog Princess (HP4000) |
| Drops | Frog Prince’s Eboshi Hat (rare) |
| Location | Vagrant Camp |
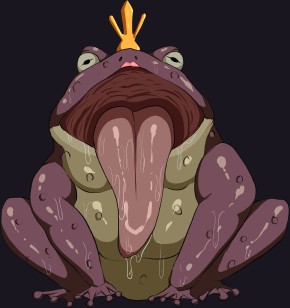
| HP | 4,000 |
|---|---|
| EXP | — |
| Weakness | — |
| Immune | Poison, Burn, Sleep |
| Drops | — |
| Location | Vagrant Camp |
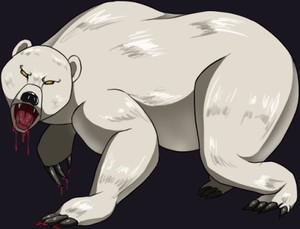
| HP | 18,000 |
|---|---|
| EXP | 18,000 |
| Weakness | Shot ×1.5 |
| Immune | Poison, Burn |
| Drops | All-Rending Fang (33%), Swollen Bear Gallbladder (rare) |
| Location | Gekkei Snowfield-1 |
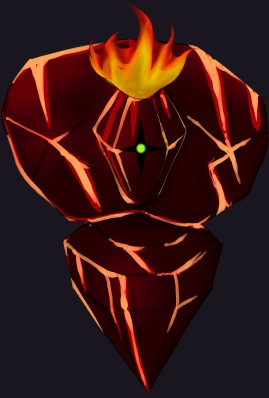
| HP | 20,000 |
|---|---|
| EXP | 25,000 |
| Weakness | Blunt ×1.5, Ice ×1.5 |
| Immune | Poison, Burn, Sleep, Paralysis, Blind |
| Allies | Wise Left Arm (HP10000); Hardened Right Arm (HP10000) |
| Drops | Golem Core (rare) |
| Location | Mage’s Labyrinth-3 |
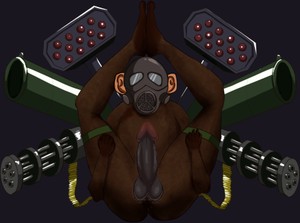
| HP | 180,000 |
|---|---|
| EXP | 120,000 |
| Weakness | Shot ×1.5 |
| Immune | Poison, Burn |
| Drops | Rare Platinum Balls (100%) |
| Location | Masturbation Monkey Paradise-10 |
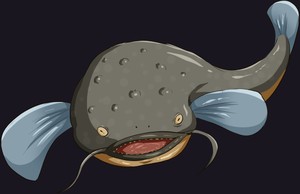
| HP | 42,000 |
|---|---|
| EXP | 32,000 |
| Weakness | Slash ×1.5 |
| Immune | Poison, Burn |
| Drops | Giant Catfish Scale (33%), Electric Storage Organ (rare) |
| Location | Lake Shigyoketsu |
| HP | 3,000 |
|---|---|
| EXP | 3,000 |
| Weakness | Ice ×1.5 |
| Immune | Poison, Burn |
| Drops | Blast Flame Sac (rare) |
| Location | Merewa Canyon-1 |
Powerful Symbol Enemies on the Map
These are visible on the field and start a fight the moment you touch them, with no confirmation window. Their stats are a clear step above regular trash mobs, so charging them early tends to end badly. Just walk around them
| HP | 100 |
|---|---|
| EXP | 40 |
| Weakness | None |
| Immune | Poison, Burn |
| Allies | Bandit Gang Grunt with Sleeping Drug (HP70) |
| Drops | Medicinal Herb (33%), Energy Herb (33%) |
| Location | Bandit Hideout 1F |
| HP | 400 |
|---|---|
| EXP | 110 |
| Weakness | None |
| Immune | Poison, Burn |
| Drops | Hollow Eye (33%) |
| Location | Forest of Despair-2 |
| HP | 800 |
|---|---|
| EXP | 300 |
| Weakness | Shot ×1.5 |
| Immune | Poison, Burn |
| Drops | Leaping Beast Hide (50%), Blood-Stained Iron Fist (rare) |
| Location | Immofussa Plain-1, Immofussa Plain-2, Merewa Canyon-3 |
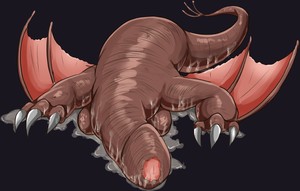
| HP | 5,000 |
|---|---|
| EXP | 5,000 |
| Weakness | Ice ×1.5 |
| Immune | Poison, Burn |
| Drops | Toxic Sac (33%) |
| Location | Merewa Canyon-3, Merewa Canyon Cave-1 |
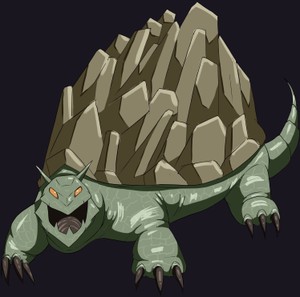
| HP | 4,200 |
|---|---|
| EXP | 1,500 |
| Weakness | Blunt ×1.5, Ice ×1.5 |
| Immune | Poison, Burn |
| Drops | Fortress Turtle Shell (33%) |
| Location | Merewa Canyon Cave-1, Merewa Canyon Cave-4, Merewa Canyon Cave 2, Merewa Canyon Cave-5 |
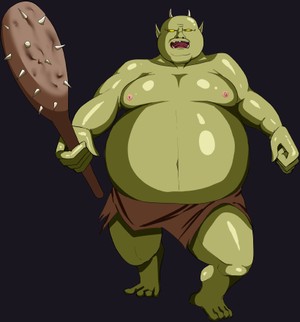
| HP | 3,500 |
|---|---|
| EXP | 2,800 |
| Weakness | None |
| Immune | Poison, Burn |
| Drops | Destroyer’s Club (25%) |
| Location | Forest of Despair-6, Forest of Despair-5, Forest of Despair-7, Forest of Despair-8, Forest of Despair-3 |
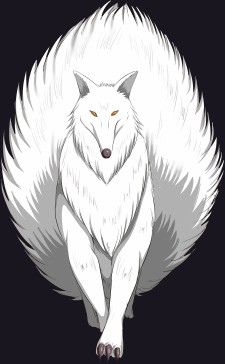
| HP | 6,500 |
|---|---|
| EXP | 4,000 |
| Weakness | Shot ×1.5 |
| Immune | Poison, Burn |
| Allies | Silver Wolf (HP2200) |
| Drops | Pure White Bristle (33%) |
| Location | Gekkei Snowfield-1, Gekkei Snowfield-2, Gekkei Snowfield-3 |
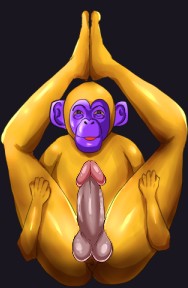
| HP | 50,000 |
|---|---|
| EXP | 50,000 |
| Weakness | Shot ×1.5 |
| Immune | Poison, Burn |
| Drops | Golden Masturbation Monkey’s Solid Gold Balls (100%) |
| Location | Masturbation Monkey Paradise-2, Masturbation Monkey Paradise-3, Masturbation Monkey Paradise-4, Masturbation Monkey Paradise-5, Masturbation Monkey Paradise-7, Masturbation Monkey Paradise-9 |
Post-Clear Bosses

| HP | 400,000 |
|---|---|
| EXP | 300,000 |
| Weakness | None |
| Immune | Poison, Burn |
| Allies | Primordial Formula-Null (HP3000); Primordial Formula-Thunder (HP3000); Primordial Formula-Flame (HP3000); Primordial Formula-Ice (HP3000) |
| Drops | — |
| Location | Miseria, City of Ruin-??? |
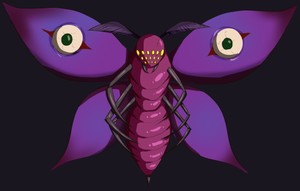
| HP | 35,000 |
|---|---|
| EXP | 40,000 |
| Weakness | Slash ×1.5 |
| Immune | Poison, Burn |
| Drops | Moth King’s Scale Powder (33%) |
| Location | Miseria, City of Ruin-6 |
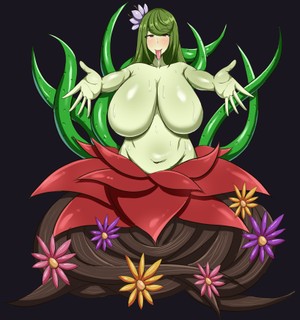
| HP | 120,000 |
|---|---|
| EXP | 75,000 |
| Weakness | Flame ×1.5 |
| Immune | Poison, Burn |
| Drops | Flower Princess’s Bouquet (rare) |
| Location | Miseria, City of Ruin-7 |
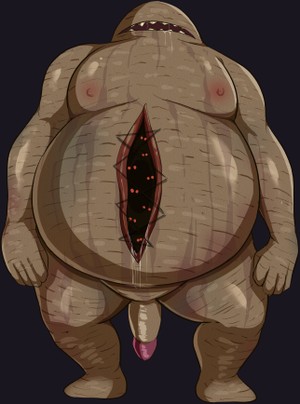
| HP | 50,000 |
|---|---|
| EXP | 50,000 |
| Weakness | None |
| Immune | Poison, Burn |
| Drops | Behemoth’s Iron Arm (33%) |
| Location | Miseria, City of Ruin-Middle Layer, Miseria, City of Ruin-Middle Layer 2 |
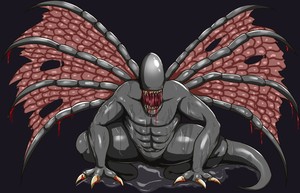
| HP | 280,000 |
|---|---|
| EXP | 150,000 |
| Weakness | Thunder ×1.5 |
| Immune | Poison, Burn |
| Drops | Black Wings That Summon Ruin (100%) |
| Location | Miseria, City of Ruin-??? |
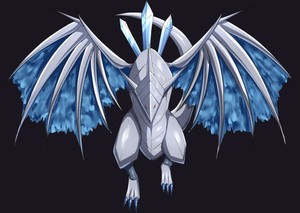
| HP | 160,000 |
|---|---|
| EXP | 90,000 |
| Weakness | Blunt ×1.5 |
| Immune | Poison, Burn |
| Drops | Ice King Dragon’s Reverse Scale (rare) |
| Location | Gekkei Snowfield-4 |

| HP | 140,000 |
|---|---|
| EXP | 90,000 |
| Weakness | Slash ×1.5 |
| Immune | Poison, Burn |
| Drops | Thunder King Dragon’s Reverse Scale (rare) |
| Location | Miseria, City of Ruin |
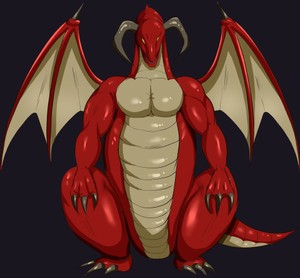
| HP | 150,000 |
|---|---|
| EXP | 90,000 |
| Weakness | Shot ×1.5 |
| Immune | Poison, Burn |
| Drops | Flame King Dragon’s Reverse Scale (rare) |
| Location | Immofussa Plain-2 |
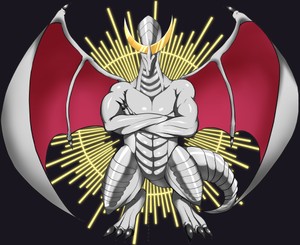
| HP | 500,000 |
|---|---|
| EXP | 300,000 |
| Weakness | Ice ×1.5 |
| Immune | Poison, Burn |
| Drops | Primordial Dragon’s Heavenly Scale (100%) |
| Location | Merewa Canyon ??? |
5. Key Boss Strategies
Geha the Old Mage
- His physical attack is only 5, all of his damage comes from magic, so magic defense gear pays off noticeably.
- The biggest trap: the moment he is the only one left on the field, he immediately revives a fallen puppet soldier at full HP. This triggers on the check “is he alone on the field”, not on a fixed turn timer, so clearing out the puppet soldiers just gives him infinite lifelines. Leave the puppets alive and focus fire the main body.
- Forced scenes play when his HP drops to 60% and 30%, and he cannot be killed until each one finishes.
- This fight can be lost, and losing leads into the “BAD END ~The End of Pregnant Sow Kirsten~” scene, after which you can choose to retry.
Preliminary Fight: The Old Man
- Identical stats to Geha but worth zero EXP. You cannot flee and cannot lose, a defeat is an instant game over.
- He revives your fallen party members, with the line “Get up. The execution is not over yet.” That is exactly why this fight is set as unlosable, he has no intention of letting you die.
- Make sure your supplies are topped up before entering the deep levels, because this fight leads straight into the Geha fight proper with no chance to regroup in between.
Aria the Undying Witch
- HP 400,000. Physical attack is only 5, so the entire threat comes from magic.
- Four “Primordial Formulas” sit beside her and enter the field one per turn: Flame on turn 1, Ice on turn 2, Thunder on turn 3, Null on turn 4, so the set cannot be complete before turn 4 at the earliest.
- Core mechanic: while she and all four formulas are alive, she casts “Primordial Magic” for a flat 99,999 damage to the entire party. The damage is a constant, it is not reduced by defense, and only non-elemental resistance and damage multipliers affect it, so it is effectively a wipe.
- She does not replenish formulas on turns 1 through 4, which is the golden window for dismantling them. Kill each formula as it appears and you never let all five stand together.
- From turn 5 onward she revives one destroyed formula after every action she takes, so past turn 5 you have to keep clearing the field, and letting all four stand at once means eating Primordial Magic.
- She is almost entirely immune to instant death, completely immune to poison and burn, and success rates for blind, sleep, paralysis, and similar statuses are heavily suppressed.
- This fight can be lost, and it is not required to clear the game, so you can skip it if she is too much for now.
6. Branches and Save Advice
| Item | Type | Notes |
|---|---|---|
| Clear ending | Single | Only one clear sequence exists, and choices or affection will not change it. |
| Virgin clear | Branch within the ending | The ending sequence checks whether the “experience count” is zero, and hands out a dedicated item if it is. Players who want that item have to avoid the relevant content for the whole run. |
| Geha defeat scene | One-time | The full BAD END scene only plays the first time you lose to Geha, and is skipped on every attempt after that. If you want to watch it, take your time on the first loss. |
| Post-clear content | One-way unlock | Requests and challenges that appear after clearing never disappear, so you can work through them at your own pace. |
Recommended save points: one separate save before entering the Mage’s Labyrinth deep levels, and another before beating Geha. The first is for pre-clear collecting, the second means you do not have to replay the entire labyrinth if you want to see the defeat scene again
7. Key Items and Endgame Gear
| Item | How to Obtain | Use |
|---|---|---|
| Dissection Solution | Sold at item shops | Target one monster and its rare drop rate goes to 100%. This is how you complete material collections. |
| Demi-Human Charm | Story reward in the Demi-Human Settlement | Accessory. Doubles normal drop rates while equipped, essential for material farming. |
| ☆Mirror of Transference | Story reward | Opens a warp list letting you travel directly to towns you have visited, and to the recollection room after clearing. |
| Condoms | Bought at the first-floor counter of the Harapania love hotel | Required for the request “Extend a Loving Hand to the Pitiful Vagrants!”, and also affects whether some events can trigger. |
| Handkerchief Covered in “ぬ” | Mebuchi Frontier Village | Delivery item for the request “Searching for a Handkerchief”. |
| Pure White Thread | Dropped by Small Caterpillars | Three needed for the request “Searching for Pure White Thread”. |
| Large Mushroom | Forest of Despair, defeat Wonder Mushrooms (weak to fire) | Five needed for the request “Mushroom Foraging in the Forest”. |
| Snow Rabbit Ears | Gekkei Snowfield, defeat Perpetually Aroused Rabbits | Five needed for the request “The Snowfield Where I Once Hunted Rabbits”. |
| Flame King / Thunder King / Ice King Orbs | Defeat the three King Dragons post-clear | Rewards for the three post-clear requests. |
Ultimate Weapons by Character
Each character can only equip their own class’s weapon type, so “best weapon” is an independent question for each one
Ultimate weapons by character← Swipe horizontally →
| Character | Weapon Type | Ultimate Weapon | ATK | M.ATK | How to Obtain |
|---|---|---|---|---|---|
| Kirsten | Gunblade | Radiant Cannon Blade “Glory” | 250 | 250 | [Post-clear] Sold at: Telas Blacksmith & Item Shop, Mebuchi Frontier Village, Arena Underground Blacksmith & Item Shop, Demi-Human Settlement |
| Jay | Bow | Deep Green Spirit Bow | 0 | 160 | Found at: Miseria, City of Ruin-3 |
| The Middle-Aged Apothecary | Staff | Serpent Staff | 90 | 160 | Found at: Miseria, City of Ruin-1 |
| The Foreign Fighter | Knuckles | Battle Knuckles | 180 | 0 | Comes with Rei when she joins |
| Jinu | Dagger | Nameless | 180 | 0 | Comes with Jinu when he joins |
| Rei | Knuckles | Battle Knuckles | 180 | 0 | Comes with Rei when she joins |
| Aria | Staff | Serpent Staff | 90 | 160 | Found at: Miseria, City of Ruin-1 |
Kirsten’s gunblade is the only ultimate weapon you can simply buy, though the blacksmith will not stock it until after you clear the game. Everyone else’s best weapon is either a fixed pickup inside Miseria, City of Ruin, or gear the character already brings when they join
Best Armor
Best armor list← Swipe horizontally →
| Armor | DEF | M.DEF | How to Obtain |
|---|---|---|---|
| Corrupting Dark Armor Eclipse | 250 | 250 | [Post-clear] Sold at: Telas Blacksmith & Item Shop, Mebuchi Frontier Village, Arena Underground Blacksmith & Item Shop, Demi-Human Settlement |
| Resplendent Velvet | 180 | 220 | [Post-clear] Sold at: Telas Blacksmith & Item Shop, Mebuchi Frontier Village, Arena Underground Blacksmith & Item Shop, Demi-Human Settlement |
| Golden Battle Garb | 220 | 180 | [Post-clear] Sold at: Telas Blacksmith & Item Shop, Mebuchi Frontier Village, Arena Underground Blacksmith & Item Shop, Demi-Human Settlement |
| Crimson Blood Armor | 168 | 152 | [Post-clear] Sold at: Telas Blacksmith & Item Shop, Mebuchi Frontier Village, Arena Underground Blacksmith & Item Shop, Demi-Human Settlement |
All four only appear at the blacksmith after you clear the game. On raw numbers “Corrupting Dark Armor Eclipse” wins, but the other three each lean a direction: pick “Resplendent Velvet” for magic defense and “Golden Battle Garb” for physical defense
How to Pick Accessories
Accessories add almost no defense, their entire value is in their special effects. The most practical group is the ones that completely nullify a specific status ailment: the Antidote Injector blocks poison, Night Vision Goggles block blind, the Electric Massager blocks paralysis, the Energy Drink blocks sleep, the Cooling Patch blocks burn, and the Intrauterine Contraceptive Device permanently blocks fertilization
High-difficulty bosses mostly pressure you through status ailments, so checking what your opponent inflicts before the fight and swapping in the matching accessory works far better than stacking raw defense. The three King Dragon request rewards (“Flame King / Thunder King / Ice King Orbs”) are accessories too, obtained by finishing the post-clear requests
8. H Scene Trigger List
All 58 H scenes and how each one triggers. Players going for full recollection room completion can work down this table item by item, and plenty of them are “only unlocks if you lose” or “requires specific gear to approach an NPC”, so they get missed unless you deliberately go after them
Full H scene trigger table← Swipe horizontally →
| H Scene | Trigger Condition |
|---|---|
| Childbirth (Hospital) | Give birth at the hospital while pregnant |
| Childbirth (Outdoors) | Use the childbirth skill somewhere other than the hospital while pregnant |
| Defeated Kirsten in the Northern Highway | Lose the event battle on the Northern Highway |
| Defeated Kirsten in the Mage’s Labyrinth | Lose to the boss of the Mage’s Labyrinth |
| Milking | Occurs during the request “Handing Over Breast Milk Is Your Job, Right?” |
| The Female Who Lost to the Bandits | Lose at the bandit hideout |
| The Female Offering Her Meat Pot to the Noble Brat | Occurs during the request “A Certain Noble’s Top-Secret Request” |
| While She Was Asleep… | Stay at the inn in the vagrant camp |
| This Is What Fulfilling Your Duty Means | Occurs during the request “An Elder Is Like a Father” |
| The Goddess in the Vagrants’ Hearts | Occurs during the request “Extend a Loving Hand to the Pitiful Vagrants!” |
| The Lightning-Fast R*pists | Approach the vagrant camp NPCs while equipping the Condom Loincloth |
| Those Nipples Could Swallow a Cock Whole! | Lose to the low-rank fighter at the Harapania arena |
| Losers Have No Human Rights | Lose to the mid-rank fighter at the Harapania arena |
| Semen Shower! | Lose to the high-rank fighter at the Harapania arena |
| War Demon VS KING | Lose to KING at the Harapania arena |
| An Incompetent Female Needs Proper Training | Occurs during the request “Thrills and Chills! Her First Part-Time Job ♥” |
| Monkey King KING | Occurs while fighting Monkey King KING in the Masturbation Monkey Paradise |
| Nursing Behemoth | Occurs while fighting the Nursing Behemoth in Miseria, City of Ruin |
| A Model Educator | Occurs during the request “Take the Legendary Podium!” |
| Ah! A Wild Masturbation Monkey Appeared! (Sex Edition) | Approach the Masturbation Monkey Paradise NPCs while equipping the Condom Loincloth |
| Ah! A Wild Masturbation Monkey Appeared! (Blowjob Edition) | Approach the Masturbation Monkey Paradise NPCs while equipping the Condom Loincloth |
| Belly-Slam Kangaroo Battle H | Occurs while fighting the Belly-Slam Kangaroo on Immofussa Plain |
| Bandit Gang Grunt Battle H | Occurs while fighting the Bandit Gang Grunt carrying sleeping pills at the bandit hideout |
| Amorphous Creature Battle H | Occurs while fighting the Amorphous Creature in Merewa Canyon |
| Black Widow Battle H | Occurs while fighting the Black Widow in the Forest of Despair |
| Forest Troll Battle H | Occurs while fighting the Forest Troll in the Forest of Despair |
| Wild Stallion Battle H | Occurs while fighting the Wild Stallion on the Northern Highway |
| Low-Rank Fighter Battle H | Occurs while fighting the low-rank fighter at the Harapania arena |
| Mid-Rank Fighter Battle H | Occurs while fighting the mid-rank fighter at the Harapania arena |
| High-Rank Fighter Battle H | Occurs while fighting the high-rank fighter at the Harapania arena |
| Tentacle Lifeform Battle H | Occurs while fighting the boss on the train |
| Perpetually Aroused Rabbit Battle H | Occurs while fighting the Perpetually Aroused Rabbit in the Gekkei Snowfield |
| 4P ~Jay’s Turn~ | Use Jay’s lewd skill while every party member has already used a lewd skill |
| 4P ~The Old Man’s Turn~ | Use the Middle-Aged Apothecary’s lewd skill while every party member has already used a lewd skill |
| 4P ~The Partner’s Turn~ | Use the Foreign Fighter’s lewd skill while every party member has already used a lewd skill |
| Lewd Time with Jay ① | Use “Lewd Begging ♥” while aroused |
| Lewd Time with Jay ② | Use “Lewd Begging ♥” on your second arousal within the same battle |
| Lewd Time with the Middle-Aged Apothecary ① | Use “Let’s Do Something Lewd… ♥” while aroused |
| Lewd Time with the Middle-Aged Apothecary ② | Use “Let’s Do Something Lewd… ♥” on your second arousal within the same battle |
| Lewd Time with the Foreign Fighter ① | Use “Oh, So Lewd… ♥” while aroused |
| Lewd Time with the Foreign Fighter ② | Use “Oh, So Lewd… ♥” on your second arousal within the same battle |
| The Undying Witch, Craving a First Load | Examine the yellow light in Miseria, City of Ruin |
| The Undying Witch, Drowning in Pleasure with the Prince | Examine the yellow light in Miseria, City of Ruin |
| The Undying Witch, Mating in Earnest with the Emperor | Examine the yellow light in Miseria, City of Ruin |
| The War Demon and the Undying Witch Enjoy an Orgy with the Vagrants | After Aria joins, talk to the man inside the tent at the vagrant camp |
| Playing Around Through Sex Work ① | Occurs during a call-out event |
| Sex Work ~Nipple Licking and Handjob Edition~ ① | Occurs during a call-out event |
| Sex Work ~Rimming Edition~ ① | Occurs during a call-out event |
| Sex Work ~Titfuck Edition~ ① | Occurs during a call-out event |
| Sex Work ~Condom Sex Edition~ ① | Occurs during a call-out event |
| Sex Work ~Raw Sex Edition~ ① | Occurs during a call-out event |
| Playing Around Through Sex Work ② | Occurs during a call-out event |
| Sex Work ~Nipple Licking and Handjob Edition~ ② | Occurs during a call-out event |
| Sex Work ~Rimming Edition~ ② | Occurs during a call-out event |
| Sex Work ~Titfuck Edition~ ② | Occurs during a call-out event |
| Sex Work ~Condom Sex Edition~ ② | Occurs during a call-out event |
| Sex Work ~Raw Sex Edition~ ② | Occurs during a call-out event |
| Sex Work ~Big Belly Sex Edition~ | Occurs during a call-out event in the bottom-right room accessible while pregnant |
A few categories that are easy to miss: defeat-unlocked scenes require deliberately losing (bandit hideout, all three arena ranks plus KING, the Northern Highway, and the Mage’s Labyrinth); equipment-triggered ones require getting the Condom Loincloth before approaching the NPCs; in-battle command ones require using the matching companion’s lewd skill while aroused, and clearing the ② series on top of that means getting aroused twice in a single battle
Bonus Gallery
Below are the in-game event CGs and the restraint suit body state portrait, covering the 4P event, the underground bar, the defeat scenes for arena champion KING and Geha in the final labyrinth, the milking event in Mebuchi Village, and companion Rei’s event.
This media contains 18+ content
Please confirm that you are at least 18 years old before viewing this media.
Game Information
| Title | Demon General Kristen (戦鬼キルスティン) |
| Publisher | 072 Project |
| Developer | シコルスキー大佐 |
| Languages | Traditional Chinese (the Steam page lists Traditional Chinese, Japanese, English and Simplified Chinese as planned) |
| Genre | Turn-based RPG |
| Recommendation | ★★★★☆ |
| Gameplay | ★★★★☆ |
| Value for Money | ★★★★☆ |
| SONY’s Playtime | About 10 hours for a standard clear; over 25 hours so far going for full story completion |
| Price | NT$304 on DLsite (check the store links below for the current discount) |
Where to Buy Demon General Kristen
072 Project (Traditional Chinese edition):Buy Now
DLsite (RJ338982):Buy Now
Steam:Store Page
Your purchase is the biggest support and encouragement you can give the developer and us
Gentlemen, together, we grow stronger!